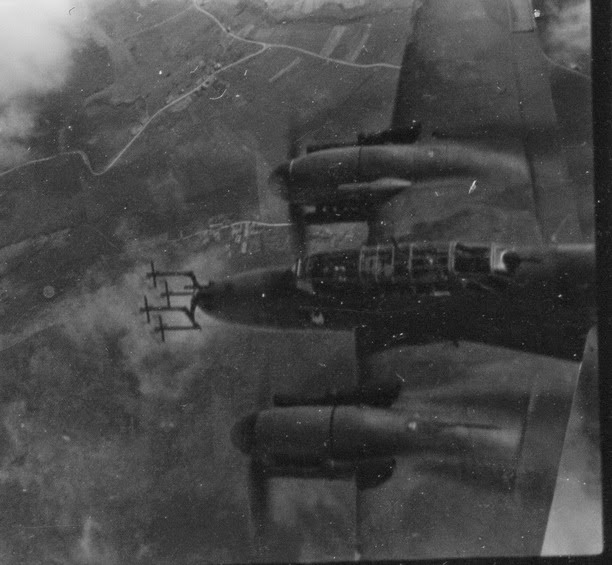
More reference photos and Dornier Do 17 handbook illustrations on this blog
here
A quick look at the new-tool Airfix Dornier Do 17 Z with the best bits of a WIP courtesy of 'Stew' on BM. 'Stew' built two Dorniers simultaneously, one wheels up with crew from the 'Dogfight Double' kit and used three different paint sets trying to find the 'right' 70/71 finish! I have yet to build mine. Most modellers who have finished it are agreed that it a good kit with a well detailed cockpit that it’s best to take some time over. There are some tricky areas, most notably installing the cockpit armament and assembling the engines. The framing on the sides of the canopy is also a little bit vague. Thanks to 'Stew' for allowing me to re-post some of his best pics and words here. Click on the images to get in closer. That cockpit looks amazing Stew!
The cockpit assembled and then painted with all parts in situ. The harnesses are from Eduard.
" Most of the detail is still accessible, I would have left the chairs out given the choice but foresaw no end of trouble sticking them back in when everything was painted. I think only the throttle box next to the pilot's seat will be a bit tricky, everything else is pretty much as accessible as it was on the sprue..I applied a Citadel brown wash to the interiors followed by a dry brush of RLM02 - it perhaps looks a little excessive at this stage, but it is barely visible once the fuselage is all buttoned up.."
"...
Now according to the instructions the next step is to button up the fuselage before adding the ventral gun window and the internal parts behind the dorsal gunner.. that looks like trouble to me, ideally I would add the internal parts before closing up the fuselage, perhaps add the ventral glass afterwards... but in fairness to Airfix I can't say the instructions are in error if I don't at least try it their way, so I will do that and see how it goes.."
".
.I added the ventral gun window, and the rear section of the cockpit as per the instructions. I suggest that you offer the part up gently and fit without applying pressure; it should click into place but you might have to hold it there until it sets. I tested the rear cockpit against both sides of the fuselage halves before I glued them, so I knew fairly well where it ought to fit, I would recommend that you do the same..I then added the structural cross-piece members to the bomb-bay and am now leaving it all to set. I followed the same procedure for the second Dornier being built wheels-up with crew, the fuselage halves went together more easily in the absence of the crew, but the rear-cockpit piece took longer to find the right place for it; swings and roundabouts I suppose..."
Fitting the upper wing. "..
.since Dornier 1 was having a closed bomb-bay, I decided to fit the top upper wing next. The fit at the front was good, at the back less so, though that may be my fault, as my attention was on the front of the wing which required a little pressure to keep the join closed until the PlasticWeld set. I applied filler to the back join and will attend to this later (the join isn't that bad by the way, I just slapped on too much filler as usual.."
Fitting the lower wing. "
.. it didn't feel like I got a very good fit out of my first build and I needed some filler at the roots - this might have more to do with my clumsy fit of the upper wing than indicate any problem with the kit itself.."
"...
fitted the wings to Dornier 2 after a quick burst of RLM 02 to the unpainted parts in the bomb-bay and the landing gear bays. I don't know if I was less careless, more lucky or just more cautious, but this time I used poly adhesive on the wings outboard as far as the end of the flaps, left them to dry then glued the outboard section of the wings with Plastic Weld... and got no gaps at all. So I guess that I can't blame Airfix for the gaps on Dornier 1 .."
Below, next step, fitting the engines. ".
.I've assembled the cowlings - the big slot is where the exhausts will exit, and there are two other slots which fit around the intakes fitted to the engine mounts which you can see behind the cowlings. It is perfectly possible - easy even - to fit the cowling sides the wrong way round. It is so easy in fact, that I did it, fixed it, then did it again.. the big slot goes at the side of the cowling ring with the missing rim; you will know it when you see it.."
"
...secondly: this is the T-shaped piece of plastic that you fit last of all around the exhausts....if you remove it from the sprue now and test fit it to the gap that it has to fit in later, you will probably congratulate yourself on your foresight; I found a little filing of the slot was required and that would have been a tricky job later on..."
"...
The actual cowlings fit so well that glue is really not necessary, but I dabbed superglue gel round the outsides of the engine cylinders just for my own peace of mind. Then came the T-shaped parts that fit round the exhausts, which I suspect are the parts which people have had trouble with; I certainly did and developed a surprisingly deep and powerful hatred of part B28 (times two, or if you are building two Dorniers, times four). They did for some reason fit rather better in Dornier 2 - the uncrewed one - but even then it was a bit of a trial. The only alternative I can think of is to assemble the engine then fit it in the cowling rather than to the wing, add parts B28 which will at least be easier to fiddle with and then attach the whole caboodle to the wings... but I didn't try it and there might be some very good reason not to do it...."
Applying RLM 65 to the undersurfaces using the Hataka paint from their Early War Luftwaffe set.
Above, unhappy with the low contrast 70/71 of the Hataka acrylics. ".
.The 70/71 scheme was a very low contrast scheme, in black and white photos it is often difficult to see where one colour ends and the other begins, and sometimes aircraft appear to be painted entirely in one colour only... but whether the same should be true in a colour photograph is another matter.."
. "..
I had already set out upon a scheme to alter the camouflage as best as I could with an brushed overpaint of Phoenix Precision Enamels...
.I think given the overall lack of success I have had with the Hataka paints I will leave them at this point, they may well be the very best quality paints and precisely colour-matched, there is a strong possibility that all the problems I had with them were self-created, but whatever, I am not of a mind to keep on with them until one of us breaks. For Dornier 2 I will try the AK Interactive acrylics and see how I get on with those (but still keep my Phoenix Precision enamels in reserve) .."
Below; second build finished in AK Interactive acrylics. "
..the AK paints go on nicely and leave a good smooth coat; as for the colours... well...that contrast is a bit excessive; though it is slightly exaggerated by the bright light (without which I seem to be unable to take a picture that is focused) and I am going to keep it rather than repaint this one too. As I said, I have never so far as I know seen a German WW2 bomber in its authentic colours so this might be spot on for all I know, or the difference between this and, for example, the Phoenix paints interpretation of the 70/71 colours could be the difference between a fresh paint-job on the real aircraft and what it would look like after six months in service... ""
Note on the bomb bay "
..If you are building this kit and using the SC 50 bomb-load as I did, please be aware that the bombs are divided into left- and right-hand side stowage as are the bomb-racks and it is entirely possible to attach the the bombs to said racks facing the rear of the aircraft instead of the front - i.e. backwards - and not find this out until you attempt to install the racks in the fuselage... furthermore it is possible to do this even after you noticed it was possible to do it, and determined that you were not going to and that you would pay attention and do it the right way round. I was mortified- I fixed it by cutting off the little tabs that differentiate the tops of the bomb-racks from the bottom and superglued the racks in position using only the contact area at the bottom of the racks. I'll need to touch-up the RLM 02 in parts of the bomb-bay and the undercarriage (which fits very cleverly and well into the bay meaning you can paint the undersides without any tricky masking of the landing gear) before adding the gear doors and wheels.."
Below; removing the canopy masking prior to painting the guns,
".
.I sprayed a bit of just-about-satisfactory exhaust staining then painted the exhaust pipes and guns. need to install the landing light in the port wing, paint in the wingtip navigation lights in and the tip of the pitot silver and I think that will be about it..."
Airfix Dornier Do 17 Z representing the aircraft flown by the
Staffelkapitän of 9./KG.76 which took part in the ill-fated raid on RAF Kenley on 18 August 1940, built by 'Stew Dapple'.
F1+DT ended its operational history this day with a crash-landing at Leaves Green, near Biggin Hill, in Kent, having been damaged over Kenley by AA fire and attacks from 111 Squadron Hurricanes. The crew - Hptm Joachim Roth, Obltn Rudolf Lamberty, Hptm Gustav Peters, Ofw Valentin Geier and Fw Hugo Eberhard - all survived, albeit all injured to various degrees. The Kenley raid is minutely analysed and described in detail by Dr Alfred Price in his excellent book 'The Hardest Day'.
Above;
Dogfight Double KG 3 Dornier also built by 'Stew'
Stew summed up his two builds of the new-tool Airfix Dornier Do 17 Z for Luftwaffe blog readers;
"..
Well I liked both builds for different reasons, the Dogfight Double version was simpler and mostly easier apart from fitting the crew figures in; the 9/KG76 version was more complicated but it was more interesting with the bomb-bay open (which is not an option if you are using the display stand) and the flaps and landing gear deployed... plus I wanted to do one of the Kenley raiders since I first read Dr Alfred Price's book The Hardest Day and the F1+DT was probably the most famous of them, if only due to it being the most photographed (plus it was Staffelkapitän Roth's aircraft so perhaps more significant than the others in that sense).
So on balance I guess it would be the 9./KG76 one..
with hindsight, I would definitely install the little skylights for the bomb-bay in the top wing before I fitted the top wing - they didn't seem to fit very well adding them in afterwards and would have been much easier to deal with at an earlier stage.
I would also dry-fit the exhaust pipes to the engine mounts and build the rest of the engine onto it, then remove the whole engine to fit the cowlings and particularly the little 'T'-shaped pieces that fit behind the exhaust outlets; I had a bit of a time getting those parts on after the rest of the cowling had been fitted with the wings getting in my way - I'm not 100% sure that would work but I will definitely give it a try if I do build another, and I would very much like to build another, time and other builds being the limiting factor here..."